Experimenting with 3D Printing
Evaluating the use of this technology will help you determine where to make the smartest investments.
Moldmakers Inc./MGS Tooling has been using various additive manufacturing (AM) technologies for several years to produce conformal and near-conformal cooling channels in molds. For projects with challenging part-design and performance features (for example, thin walls, flatness tolerances and part stability issues) or for projects where cycle-time optimization is critical, we use comprehensive process simulation to experiment with various cooling strategies. These cooling channels often cannot be created using traditional subtractive machining methods.
Unique part geometries require a mix of outside sources to create the involved mold components. As our customer’s applications grow, we continue evaluating the scope of available AM technologies to determine where to make investments in in-house capabilities.
Featured Content
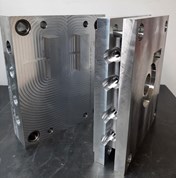
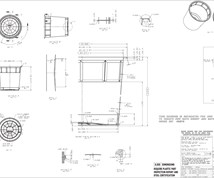
One area for consideration is prototyping. The use of 3D printing for individual or small-lot prototype production was a given. However, projects requiring a larger number of proto-parts—several dozen, for example—could easily tie up a 3D printer for weeks. Through our research, our company became aware of the option of using AM to create temporary inserts/mold components, but documented results and case study reports on this option were hard to come by. We decided to plan our own experiments using AM, setting out to 3D-print core and cavity stacks used in a mold base. We took an existing ring-like part design and modified it to approximate some of the challenging geometry features we often encounter.
Our goal was to learn as much as we could about:
• The limitations of 3D-printed injection mold components of general part design (for example, draft angles, depth of features, gating and wall thickness).
• The limitations of mold materials that could be used for the fabrication of the components (for example, which resin is suited/not suited for which technique).
• The true cost of manufacturing a mold in this fashion and the lead time for producing parts (not just the cost of the printed core and cavity components).
• The number of usable parts we could mold using any given system.
We needed to know what could be done, which also meant we had to learn what could not be done. We chose to evaluate two styles of 3D fabrication: stereolithography (SLA) and layer additive technology. We also chose three common resins to mold: polypropylene (PP), acrylonitrile butadiene styrene (ABS) and nylon 66. We quickly learned that these 3D inserts are relatively fragile and must be handled with care. Also, these materials do not pull heat out of the part the way steel does, so cycle times are much, much longer, and shrinkage results will not be transferrable to the final production model.
Evaluating the use of 3D technology is certainly not a one-day study. Several events need to be planned, all requiring a dedicated press, a process technician/operator and a project manager. Over the next few months, we will continue to try different materials and different construction technologies. I will be working closely with our engineers to assist in documenting these activities and plan on sharing many of our learnings with you in a detailed article next year.
RELATED CONTENT
-
Why Choose a Valve-Gated Hot Runner?
Moldmakers need to be aware of how different gating technology can affect their customers when designing a hot runner system into a mold.
-
Four Key Uses of Prototyping
Prototyping helps evaluate and test a design, clarify production costs, sell a product and secure patents.
-
A Different Approach to Mold Venting
Alternative venting valves can help overcome standard mold venting limitations and improve mold performance.


