Non-Contact Laser Sensor Enables Detailed Feature Inspection
Hexagon Manufacturing Intelligence’s HP-L-10.10 performs dimensional measurements at comparable accuracy to tactile probing and inspects almost any surface in a fraction of the time.
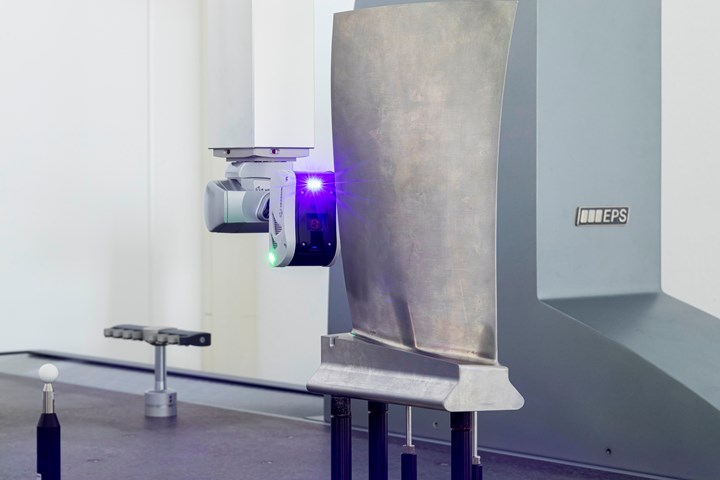
Hexagon’s Manufacturing Intelligence division announced the HP-L-10.10, a non-contact laser sensor for CMMs that is said to offer manufacturers the ability to perform dimensional measurements at comparable accuracy to tactile probing and inspects almost any surface in a fraction of the time.
The HP-L-10.10 sensor uses Hexagon’s latest cross-platform laser line scanning technology to offer similar repeatability and performance compared to tactile measurements executed on the same CMM. Furthermore, it can reportedly measure 600,000 individual points per second with a probing form error of just 8μm, rapidly capturing a complete high-resolution digital representation of a part that is valid for both surface and detailed feature inspection. The HP-L-10.10 is said to be seven times faster than its predecessor and introduces high precision scanning.
The new sensor employs Hexagon’s unique SHINE (Systematic High-Intelligence Noise Elimination) technology, making it possible to scan almost any part surface or finish at maximum speed and accuracy without user intervention.
Developed in collaboration with the device, Hexagon’s PC-DMIS inspection software enables users to automatically produce efficient laser-scanning paths by automatically generating the tips, scans and motions needed for measurement. The software can capture a single point cloud with variable point cloud density within one motion that is valid for both surface and detailed feature inspection. Users can easily visualize surface imperfections, fully exploiting the scanner’s multi-faceted capabilities to identify perceived quality issues, imperfections to feed continuous process improvement.
An integrated Overview Camera (OVC) provides a clear view of the work area with visible guides on the part that indicate the measurement range. The visible guides help to warn the quality technician when the measurement range is exceeded, enabling for easier routine creation and inspection through PC-DMIS software. The overview camera also reportedly improves productivity and collaboration during inspection; for example, photographing a part surface that is out of tolerance so the operator and production colleagues can quickly locate the problem.
RELATED CONTENT
-
Higher-Level Laser Mold Texturing
Eroded, sandblasted and chemically-etched mold textures are now 100-percent lasered at this Germany-based service provider.
-
Laser Welding Versus Micro Welding
The latest battle in finely detailed restoration/repair of mold materials.
-
Texturing Molds for Thermoplastics: Factors for Success
Factors to consider when selecting a texture or grain for a thermoplastic mold or die.


