Noncontact Laser Scanner Enhanced for Mold Inspection Suitability
Wireless Nikon Metrology LC15Dx inspection tool features increased resolution and accuracy of data acquisition for continuous feedback of metrology information, further enhancing its versatility and efficiency.
Edited by Grace Nehls
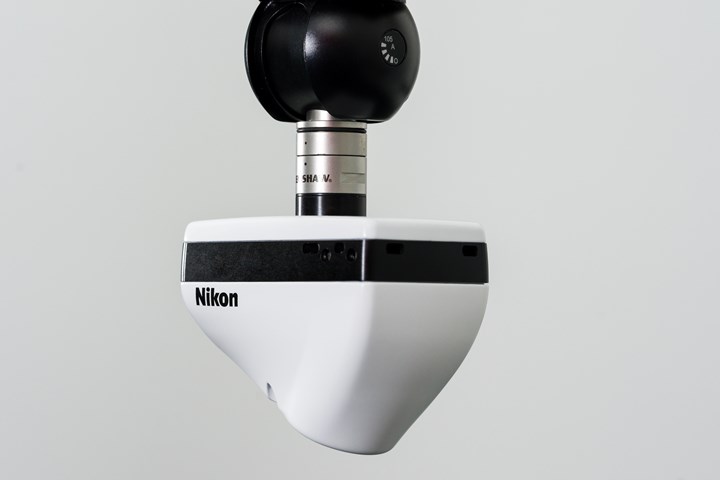
The LC15Dx laser scanner manufactured by the Industrial Metrology Business Unit of Nikon Metrology is a global benchmark for efficient measurement and inspection of manufactured components, especially those with complex freeform geometry. Compatible for use with all metrology platforms and software, a new version of the sensor has been launched to make it more suitable for quality 4.0 inspection applications.
The LC15Dx laser scanner, used as part of the inspection process, can be attached to certain types of coordinate measuring machines (CMMs), which then allows the manufacture to scan the mold to make sure it is machined within tolerance. In some cases, manufacturers can scan parts that need to be molded and reverse engineer complex surfaces that can be used in the moldmaking process.
The device is reported to be one-third better than previous models, delivering more accurate and repeatable dimensional measurements on a scale of 15 microns versus the original 10 microns.
Improvements have been made to the custom-designed, in-house manufactured scanner lens, improving structural resolution to enable finer surface texture and detail. The LC15Dx also incorporates a patented Nikon software algorithm that maintains scanning accuracy, speed and data quality by automatically adapting the laser settings in real time at each measured point to match the type and reflectivity of the material being examined.
Nikon reports quicker scanning capabilities after being switched on, raising productivity when inspecting or reverse engineering components. Alongside these developments, Nikon’s laser scanning models are completely wireless so they can be adapted to support a variety of applications, whether they are mounted on production machines or adapted to metrology equipment. The inspection tool’s operations may also be combined with tactile probing for multi-sensor measuring routines on a CMM, with automation options using a change rack, enabling deep bores or other difficult-to-see internal features to be accessed by a touch-trigger probe.
RELATED CONTENT
-
Noncontact Tactile Measurement Tool Advances Moldmaking Equipment
The Laser Contour Check from Walter, a brand of United Grinding, combines a blue laser and intelligent measuring system to accurately measure tool parameters on grinding and eroding machines.
-
Dual-Mode Metrology Scanner for Accurate Mold Measuring
The highly ergonomic and compact FreeScan Combo from Shining 3D adopts metrology-grade accuracy, fine scanning and high precision for inspection and reverse engineering.
-
SLM 3D Printer Focuses on Complex Geometry Development
Newly launched DMG MORI Lasertec 30 SLM US 3D printer features adaptive beam control, noncontact recoating and a hybrid toolpath strategy for more dynamic additive capabilities.


