Speed Mold Verification and Improve Global Cooperation
Technology solution that combines model-based inspection software and portable inspection devices to improve mold verification.
#regulations #analysis
Today’s moldmakers are finding great opportunity to modernize and speed the process of mold (and product) verification, while at the same time boosting their ability to collaborate globally with their partners and suppliers. One increasingly popular solution comes from combining model-based inspection software and portable inspection devices.
Many are reaping the benefits of portable, digital inspection devices that lend themselves to diverse requirements as well as very large molds. For smaller-sized jobs, the portable articulating CMM arm is seeing great success. Compared to stationary devices, it is lower priced, more versatile, easier to use, and can be taken anywhere to inspect molds or parts. They can be placed directly on the CNC machine or EDM bed or used anywhere on the shop floor. They also can be easily used at the final assembly such as automobile, aircraft, medical device, etc. Portable devices do not require a temperature-controlled room. The same benefits are available for large molds and parts by using laser trackers and other large volume digital measuring devices. They can verify items as large as 300 feet long with relative accuracy.
Featured Content
First Article Inspection in Less Than 10 Minutes
With a portable metrology device such as an articulating CMM arm used in conjunction with modern model-based inspection software, first articles can be completed very quickly and with little training or experience. Naturally, the complexity and size of the item being inspected affects the time it will take, but still the savings can be dramatic. While many shops have relied on stationary automated CMMs that require considerable upfront programming time, a portable/model-based definition (MBD) solution allows completion of the entire inspection process from start to finish in less time than it takes to write the CMM inspection program.
Fast first article inspection is performed in four quick-and-easy steps:
- Load CAD model: Import CAD model into metrology software; about 1 minute.
- Align: Quickly create automatic alignment routine by picking targets on CAD model. (Advanced systems will automatically employ datum targets from the CAD model if they exist.) Perform the alignment operation by probing each target on the part as directed by graphical indicators in the metrology software’s CAD display; about 2 minutes.
- Inspect: Probe the item taking data on each feature to be reported. With modern metrology software this process is simple and fast since the user is provided live feedback throughout the process. There is no need to pause to interpret anything; time to complete about 5 minutes.
- Report: Software automatically formats data for reporting and uses CAD model for nominal data as well as GD&T; approximate time 1 minute.
Job Complete!
Inspecting Hard-to-Reach Inner Mold Cavities
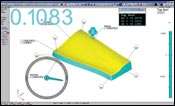
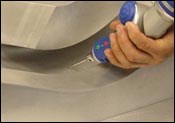
Portable CMM arms can easily be used with special elongated, bent or curved probe tips that can reach down into internal cavities that would be hard to access with traditional, stationary CMMs (see Figure 1). While the increasingly popular laser scanners have their place in moldmaking, they are line-of-site devices and therefore are limited when it comes to the inner regions of a mold. A few other challenges for laser scanners are issues with surface reflectivity and the acquisition of overkill and unnecessary amounts of data that does not simply and clearly differentiate between individual features. On the other hand, for checking molds, hard probes can be an easier, faster and less expensive solution.
Model-Based Definition Provides More Efficient Solution
One of the key aspects for productivity improvement from the portable metrology-MBD combination is the power of MBD itself. Model-based definition involves moving away from paper drawings and other external means of product definition and making the CAD model the sole source for defining the product and mold geometries.
To clarify, we can contrast the older methods to the modern MBD approach. The old process requires taking measurements with hand tools such as micrometers, calipers, gages, etc., and comparing them with dimensions from a drawing or blueprint. Somewhat newer processes employ a stationary CMM controlled by carefully written probing programs. But most of these involve measuring features and getting dimensions, then checking the dimensions against a drawing. With MBD, surfaces and holes are probed and error is expressed as deviations from nominal, as opposed to being expressed by measurement dimensions (e.g., “should be 2.00 mm, measured as 1.98 mm, error is 0.02 mm”). With MBD, deviations are shown (and recorded) instantly and continue in real-time each time a “record” button is pressed or automatically when in scan mode. It should be easy to see how this is much faster and simpler than reading dimensions from a blueprint, measuring the part with a gage, checking the dimension and tolerances, and recording the result.
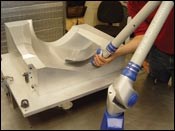
It also should be evident that this method can be much faster than writing an automated CMM program and waiting for it to run through all its paces. Stationary automated CMMs often require special rigging and setup to orient to the coordinate system. Sometimes they require re-rigging during the inspection process for the same reasons. Most CMM programmers have to go through weeks of special training to be only partially effective, and they only get really good at it after plenty on-the-job experience. The portable metrology-CMM solution allows an operator with very little training to quickly get into the CAD reference system of the part, no matter where the part is or how it is rigged (except that it be stable and not moving around), and start producing verification data instantly and with full confidence in its accuracy (see Figure 2).
Better Process Control
All products these days are designed with CAD, so it would be very rare not to have a CAD model available. Instead of having multiple means of product definition that include the CAD model, drawings, notes or check tooling, MBD relies on a single source of product definition. This minimizes errors and omissions created by multiple means of product definition disagreeing with each other. In addition to using the model to define geometry, it also can provide tolerances, datums and other important aspects of the product or mold design. The designing authority is the one who knows how the product is used and how it fits together with parts on the next assembly, so they can define key features, tolerances and datums in the model. It is much easier to keep track and to control the product definition if it is one place and easily accessible to any individuals in the enterprise with access to a CAD system, viewer or CAD-based metrology software platform.
For the ultimate in process control an automated, user-prompted inspection routine can be made using only the CAD model and automation-enabled metrology software. It uses MBD for geometry requirements and tolerances, controls how the user inspects the mold or part, and insures key features are checked according to engineering requirements. The reporting also is automatic, creating an easily understandable and well-documented analysis of compliance.
Better for Global Collaboration
Today molds are developed with partners and suppliers around the world. Aerospace and automotive industries are the good examples of global cooperation, and both have done so by considerable, thoughtful commitment to MBD.
With the process it is easy to electronically share product definition and requirements. Developing a product that has been carefully defined by the CAD model only virtually eliminates problems associated with drawings or check tooling not matching the model, or the problem of not even having this definition available at one or more of the partners.
With model-based product definition and with validation via the MBD-portable metrology solution, disconnects and disputes between global partners can be massively reduced. The result is very few ambiguities and disputable aspects of conformance/non-conformance.
Interactive GD&T
For an enterprise to fully embrace MBD and therefore open the doors to all of its benefits, it begins with CAD, followed by CAM, and finally, computer-aided inspection (CAI). Eliminating drawings and other forms of product definition and acceptance criteria in favor of MBD calls for one final step. This involves imbedding tolerances and inspection constraints within the CAD model and automatically using this data in the live analysis and reporting of the metrology software.
This approach has been coined by one of the top commercial aircraft builders as “interactive GD&T.” With this concept, each entity or group of entities within the CAD model can have a unique, associated tolerance. With this scenario, operators of the metrology equipment on the shop floor will not have to look up, record and evaluate use of tolerances. Instead, they will automatically be employed by the inspection device and metrology software.
It also is possible to apply and automatically use engineering defined datum targets. Datum targets further aid control of the process by insuring proper use of datums for alignment and relationship to the product design coordinate system. Metrology software that uses the CAD-defined datums to automatically create an alignment routine for transforming into the reference system is the ultimate in process control.
Portable Solution Well-Suited for Very Large Molds
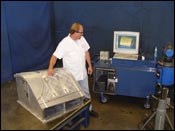
Large volume metrology such as laser trackers can inspect molds and parts over 300 feet long with accuracy that is suitable for most applications (approximately +/- 0.007" at 200 ft.) (see Figure 3). Using the same software as used on the smaller articulating CMM arms operators can quickly import CAD models as designed from the most used design systems including CATIA, Unigraphics, Solidworks, Autodesk, Pro-Engineer, and others. It also provides the same advantages in traceability of product definition, and is quick and easy requiring little training, setup or tooling.
Summary
Moldmakers are now discovering how they can make their inspection process and interaction between vendors and customers simpler and more efficient while minimizing disputes about mold/product compliance. The combination of MBD and portable metrology involves a much lower than expected investment and certainly offers a quick ROI for its users. Many companies have expressed their remorse in not discovering the technology sooner.
One final point that also needs to be clearly made: the process does not take months of implementation and highly skilled individuals with extensive training. This is not to say there is no requirement in this regard; however, most adopters should be up and running and already seeing the benefits within a week or two.
RELATED CONTENT
-
Selecting a Filler Metal for Mold Repair Welding
Mold repair welding can add more life to a damaged tool, but choosing the right filler metal can determine just how long that life will last.
-
The Ins and Outs of Hot Runner Temperature Control
A training checklist that explains the why and how of proper hot runner temperature control and system management.
-
Mold Cleaning Done Right Takes a Systematic Approach
Mold cleaning is just one part of a systematic and comprehensive approach to mold maintenance. Here’s one moldmaker’s strategy for injection mold cleaning and an explanation of where and why different techniques are employed.


