Data-Driven Quality Control
Enhanced metrology technologies can help streamline mold scanning and inspection.
#basics #FAQ #analysis
If there was ever a time when technology could play a pivotal role in increasing the efficiency of the moldmaking process, it is now. The metrology marketplace is delivering built-from-scratch measurement systems that move their best features forward, and then adding new optics, electronics and performance enhancements into the latest products. With a renewed industry focus on data-driven processes and the digital thread, these solutions can acquire 3D data when needed for better decision-making during the entire product development cycle. These improved manufacturing intelligence capabilities improve operational confidence, whether a shop is building large or small molds. Here are some technologies and applications to consider:
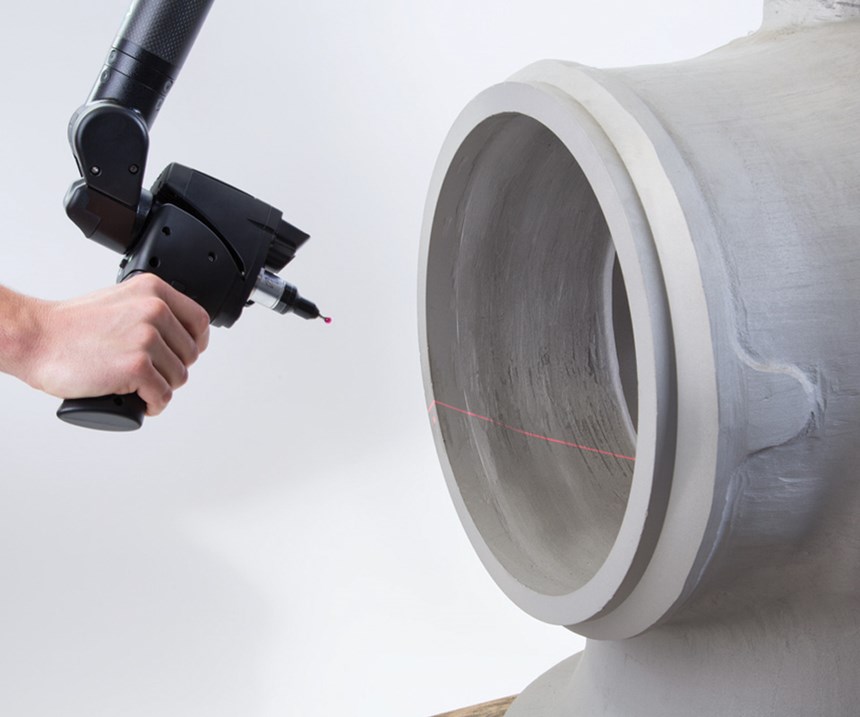
Laser trackers and handheld scanners. Laser trackers used in tandem with wireless, handheld scanners are one of the solutions being used to address in-place inspection of very large molds. Known for their ability to measure in large volumes ranging to 1,049.87 feet, laser scanners can work alongside laser trackers to achieve precision, non-contact measurement of composite aero-wing molds, energy wind blades and horizontal stabilizers. Scanning technology has evolved in portable metrology space at a steady pace, enabling the user to acquire high-definition scans of various surface types and large molds.
Featured Content
As the part scale decreases, 3D optical scanners are used to conduct photogrammetric surveys around the mold area, as well as large patch scanning on the surface. Moving to very small molds, inspection can be accomplished using portable measuring arms with integrated scanners or white-light scanners based on the fringe projection technology for precise 3D digitization of industrial components.
While a laser scanner can capture individual object points, lines as polygons, and areas as a compact point grid or point cloud, the fringe projection system measures the entire surface of the object. Its high point density not only results in more precise area measurement data, but also in a higher level of resolution. The 3D optical scanner is ideal for smaller applications like measuring cellphones or medical parts.
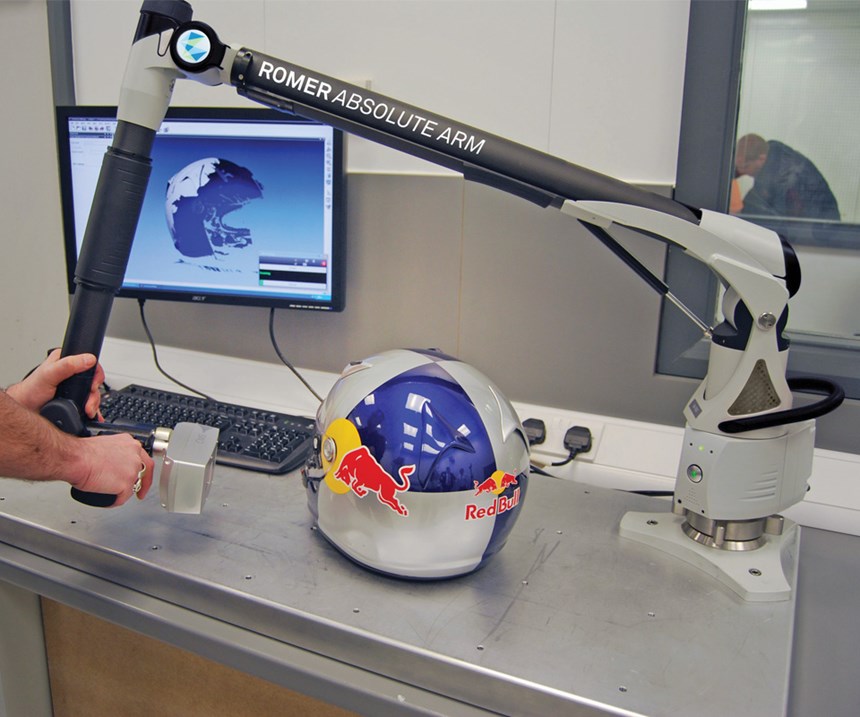
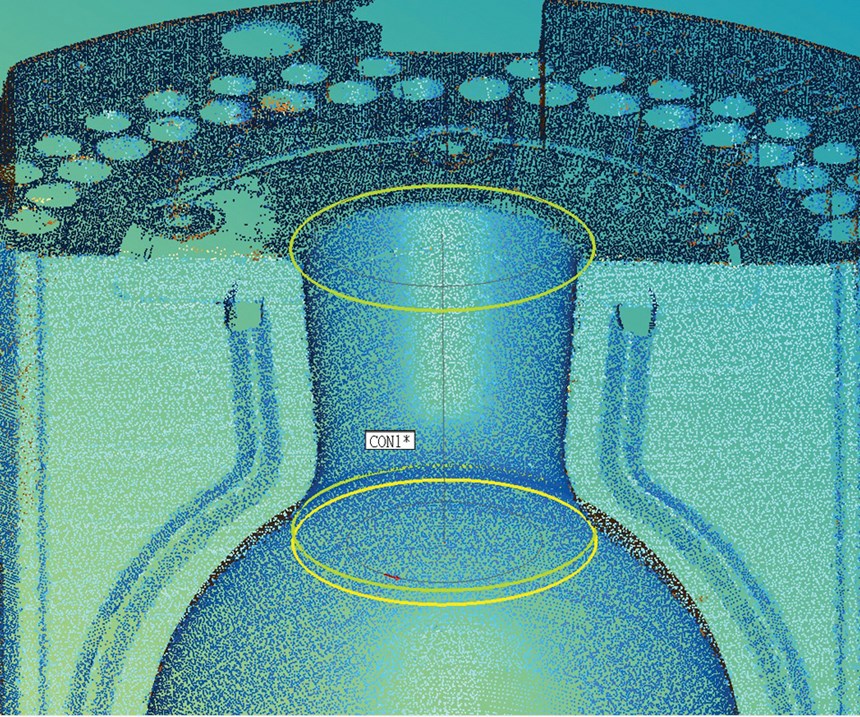
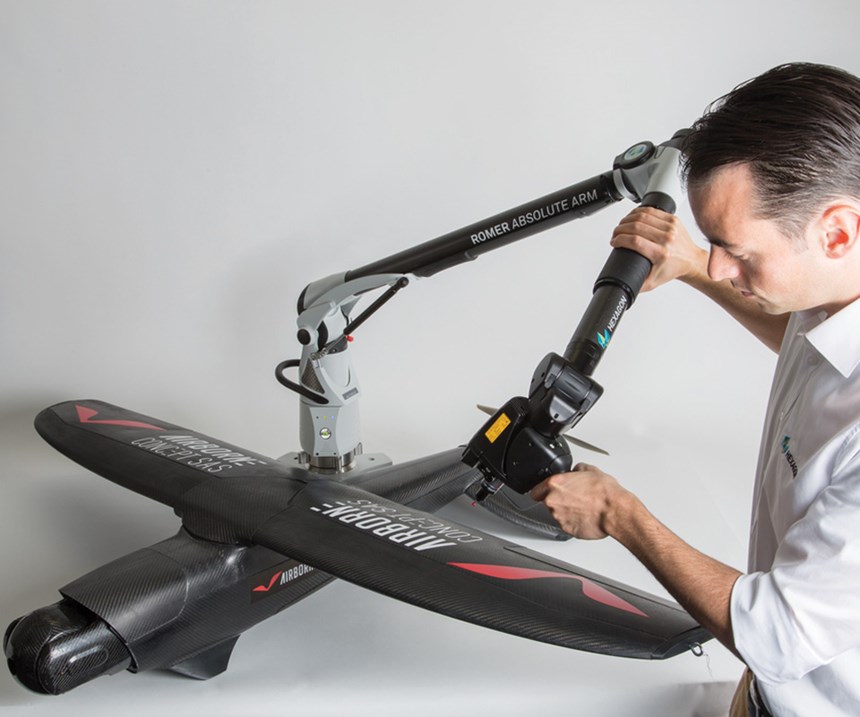
Laser scanners and portable measuring arms. For moldmakers new to inspection, scanning can be performed with a laser scanner mounted on a portable measuring arm and used in many areas of a moldmaking operation. The articulated arm looks and moves similarly to a human arm, with ergonomic zero-G counterbalance for one-handed operation from any position in the arm’s reach. The scanner works as if the operator is painting, but not touching, various angles of a mold or part surface. Thousands of surface points are gathered in just seconds. The points, in the form of a 3D point cloud, appear on the computer screen as the operator scans a mold, and the software enables the user to see the areas that have and have not been scanned on the computer screen.
Portability around the shop floor is a major benefit, and the scanning arm is available in measuring volumes ranging from 8 to 12 feet. The noncontact scanning system enables a very detailed examination of both geometric and surface features for a broad scope of applications in a mold shop. The arm scanner configuration also allows for tactile point data capture with contact probes when needed and is suited for point-cloud inspection, product benchmarking, reverse engineering, rapid prototyping, virtual assembly and CNC milling.
Some of today’s measuring arms are integrating scanners that offer a scan rate nearly 60 percent faster than older models. These scanners are optimized for measuring objects with challenging surfaces such as machined steel or carbon fiber. With a higher point resolution, users can obtain greater point cloud detail of a mold in significantly less time during a scanning session. Technicians using the arm can switch seamlessly between tactile probe measurements and laser scanning to acquire 3D point data from a wide variety of surface types. Scanner warm-up and time-consuming calibrations are not required, dramatically reducing setup time for new models.
Reverse engineering. The ability to capture a 3D digital copy of a mold quickly and “on location” ends the need to physically store a part in a specific place. The practice of reverse engineering molds is especially advantageous when dealing with automotive, aerospace and alternative power generation components, where the size of a part or its location can make it virtually impossible to simply box up the component and ship to your location.
Every manufacturer knows that floor space costs money, and storing molds or master parts can reduce the amount of free space used to actively generate revenue. With a laser scanning system, the master mold no longer has to be stored forever. A mold can be scanned and its digital representation can be saved electronically to free up valuable storage area for other shop utilization. In applications in which older parts are used, there may never have been an original CAD model related to the component. After scanning a part or mold using several intermediate steps, a 3D CAD model can be produced and stored for further use.
Automation and mold inspection. With the ultra-high resolution from scanner solutions, a mold can be measured with a semi-automated process. Just place the object on the turntable, press “go,” and walk away with an inspection. As molds grow in size, the ability to automate the process becomes more challenging. For these applications, tracker-based measurement systems and automated measurement work cells are ideally suited, including automotive and aero structure applications.
An emerging trend in metrology is the entry of automated commercial off-the-shelf systems that integrate 3D measurement technologies with sensors, software and robotics. In-line, near-line or off-line measurement work cells are scalable, portable, modular and ready to inspect large to medium-sized molds on the shop floor. These configurable, new-generation work cells are designed for easy adoption into individual production spaces. The ultimate benefit is real-time factory floor data and actionable information for operators and managers to monitor, troubleshoot and control production processes at an unparalleled level.
System Selection
Cost and value are important considerations when determining the value of one measurement solution over another for a particular application. However, a more essential consideration is the type of part or mold that needs to be measured and measurement turnaround time. For example, a company is building molds for a component that is the size of a soda bottle. For quality inspection, what is the fastest approach? What is currently being used to inspect molds, such as hand gages or traditional CMMs for tactile measurements?
Further considerations include the measurement task at hand. Is it a mold’s surface geometry or points or features? How can this data be moved toward process inspection? Does the application require 100-percent surface coverage that can be captured using a 3D optical scanner with a larger field of view? Does the operator need to verify a small, concentrated area of a mold, which is an ideal application for a flexible and portable measuring arm? Are accurate baseline scans of molds needed, or is it a reverse engineering job? Once these needs are clarified, a moldmaker can better determine the appropriate technology to address its multi-faceted measurement and inspection requirements.
No matter what the solution is, the metrology options today are light years ahead of yesterday’s tools, with easier-to-use software and hardware interfaces. But there is more to the story than that. 3D data-driven processes integrated throughout the product development cycle are the wave of things to come in the smart factory, and that includes metrology. Inside the smart factory, systems will continuously collect and process data during production operations, providing speed and confidence for fast decision-making and rapid responses to shopfloor issues. Moldmakers who embrace a digital thread will make their operations more flexible and adaptable for a new level of quality control.
RELATED CONTENT
-
Technology and Sourcing Guide 2023: Inspection/Measurement
Inspection and measurement equipment includes all of the tools and devices used to verify that mold and part dimensions conform to the tolerances required by the part’s design
-
VIDEO: Using Data to Simplify Your Moldmaking Process
MMT editorial director, Christina Fuges, sits down with Injection Molding Solutions owner John Bozzelli and ALBA Enterprises president/CEO Rich Oles to discuss the importance of data in simplifying (emphasis on simple!) processes.
-
A Look at the Mold Digitalization Evolution and Lifecycle/Performance Data Impact
Bob Vancoillie, Leader, Global Center of Excellence for Mold Management, Kenvue, Consumer Division, Johnson & Johnson shares key results that showcase the value of mold digitalization to the supply chain.


