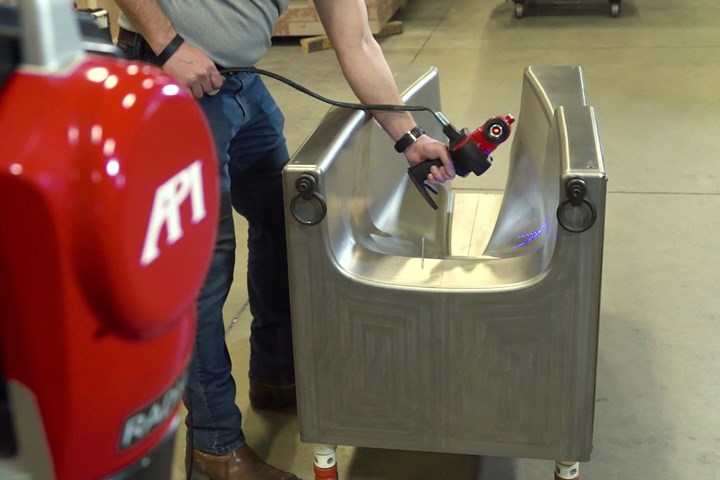
Laser trackers are essential to moldmaking because they can collect data much faster and more accurately than traditional methods. Photo Credit (including landscape image): Automated Precision Inc. (API)
Mold and machine shops used to determine accuracy in manufacturing projects with theodolites and template comparisons, but today scanning and probing with a laser tracker has become the standard in many industries because of their speed and accuracy.
These methods collect accurate points to within a handful of microns and instantly transfer those values to metrology software for analysis and comparison to existing CAD models or the creation of new ones.
Featured Content
Far from being different, the use of laser trackers might be even more essential to moldmaking, as there is a higher level of uncertainty in the molding process — from micro-sized plastic injection molds to large-scale tooling, including the potential for shrinkage.
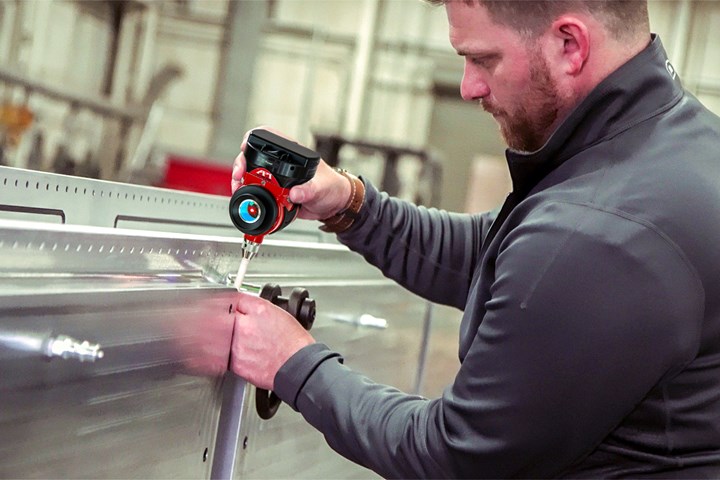
Laser trackers with probes and scanners are used throughout the moldmaking process from verifying molds to part verification.
Here are four uses of a multifunctional scanning and probing device in moldmaking:
1. Model Generation
3D laser scanning can be essential in creating a new CAD file for new molds or updating an old mold design. The scanner’s dense collection of “as-found” data points can be reverse-engineered into a mold’s CAD model, with tactile probing measurements confirming individual features of the tightest tolerances. This new model can be saved to compare future molds or for updates on future design changes.
2. Mold Inspection
The most significant way to ensure accuracy in the finished mold piece is to ensure the accuracy of the mold. In the past, contact measurement tools like vernier measuring tools, micrometers or even coordinate measuring machines (CMMs) would take methodical point measurements of molds after being machined. However, a laser tracker and an accessory capable of 3D laser scanning and/or probe measurements can complete these inspections faster while still meeting the extremely tight tolerances required in moldmaking. Scanners and probes can even be mounted to a robot’s end-effector for automated inspections directly from the production line.
3. Mold Leveling
Once you compare the mold design to the CAD model, use laser tracker measurement to verify the level of the mold repeatedly. As designs have become increasingly larger and more complex, the complete measuring range of the laser tracker has become more essential. You can also use the tracker to compare the part to the mold itself, allowing you to make mold adjustments. Probing capabilities are extremely useful for these measurements to reach hidden points outside the tracker’s line-of-sight to reduce the number of tracker setups needed to complete the measurement.
4. First Article Inspection
After verifying mold construction and installation, laser trackers can verify the parts to their CAD model with their scanning and probing accessories. Laser line scanners can rapidly generate a dense point cloud of information on the part’s features, while the probe attachment can confirm the absolute position of key features of the part. You can instantly compare this information to the CAD model to ensure the mold is producing accurate parts. Any variations out of tolerance can be machined into spec, with necessary adjustments for the mold construction and level identified.
3D laser scanning and tactile probing with a laser tracker can verify the as-built dimensions of a mold, create a CAD model of the mold for comparison and mass production, and perform a complete inspection of the first parts that come from the mold. As a result, this equipment has improved the way many industries manage their quality assurance processes, yielding more accurate parts that are increasingly larger and more intricate in a fraction of the time, saving man-hours and production time.
RELATED CONTENT
-
From CAM, Cutters and Cooling to Corrosion, Cleaning and Control
A review of the year’s top tips on technologies and strategies to improve moldmaking operations from design to first shot.
-
Integrating Electrode Production
How CAD/CAM can help make the design, machining and inspection of electrodes completely integrated.
-
Software Strategy for Automated Mold Inspection
Consider inspection software with a CAD/CAM platform that supports model-based definition, works with all CAD files, and drives all fixed and portable CMMs.


