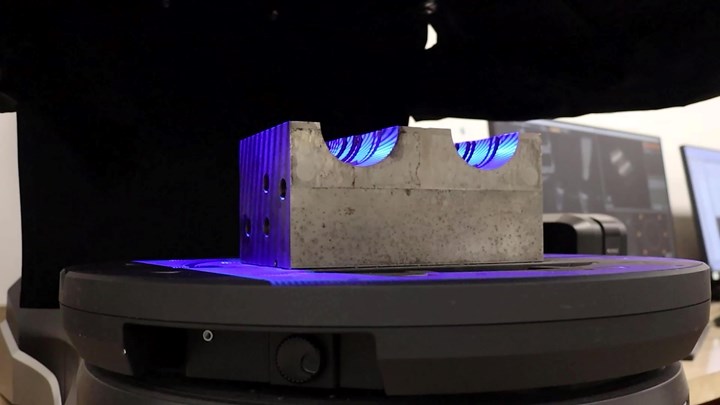
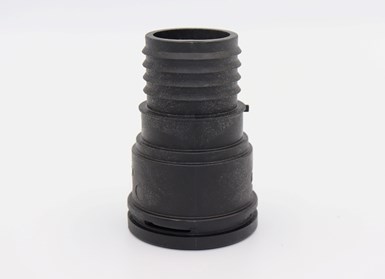
Cavity block of a hose connector set up on the 3D scanner’s stage. Photos Credit, all images: Accudyn Products Inc.
Erie, Pennsylvania-based Accudyn is a 25-year-old family-owned and operated custom injection molder and mold builder that produces highly engineered plastic parts for the automotive, building and construction, medical device, and heavy truck and off-road vehicle industries. The company has been manufacturing injection molds in-house since 2012.
Accudyn takes pride in continually investing in adding capabilities to make the business more efficient and cost-competitive. For example, the team successfully used various 2D vision and light-based measurement systems but then decided it was time to acquire 3D scanning technology in-house.
Featured Content
3D scanning has reduced or eliminated the most challenging step of the reverse engineering process: getting accurate data for the mold component that must be reverse engineered.
“After finding the right combination of accuracy within 0.0005 inch and the price to justify the investment, we purchased a Keyence VL-500 3D scanner late last year,” Don Stolarski, Accudyn’s vice president of sales & business development, says. “This technology gave us another option for measuring and validating new parts to improve the measurement efficiency of our metrology team.” However, Stolarski did not expect this technology to become essential to Accudyn’s mold repair process.
Broken Mold With No Data
In 2010, a customer transferred an injection mold for a quick-snap hose connector to Accudyn when another supplier could no longer support its needs. As is commonplace with transfer molds, the design files and drawings for the injection mold were unavailable as part of the transfer. At the time, this did not pose much of a challenge because the mold only required good preventative maintenance, venting, ejector extensions and a new sprue bushing before producing parts that met the customer’s immediate requirements.
However, part quality started to decline, as general mold wear caused by the abrasive material the mold was running began to take a toll. “Earlier this year, the mold was at its breaking point, forcing us to do something. We could no longer produce parts that formed a reliable seal in our customer’s final assembly,” Stolarski explains.
In the past, the metrology team would gather general information about the mold by physically measuring the mold’s cavities in-house with a touch probe-based coordinate measuring machine (CMM) and other gages. This measurement process would take several days to complete and then need to be manually translated into CAD/print design for an engineer to review thoroughly.
“With a two-week deadline, the mold required significant work to repair the wear evident in the cavities,” Stolarski says. “Without any original mold designs or drawings, reverse engineering using traditional measurement methods was out of the question as it would be time-consuming and put our customer’s operation at risk.”
3D Scanning to the Rescue
To determine how to expedite “good” data to support the mold repair, the Accudyn team turned to 3D scanning to analyze the mold and measure the cavities.
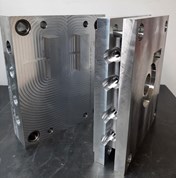
“The most important detail we were looking to determine in the scan was the circularity or ovality of the cavity geometry because these were the dimensions causing functional issues with the part. Using the CMM to generate the cavity sizes would require measuring dozens of points by hand on each of the half-circle areas of the mold at multiple locations to approximate the surfaces of the cavity steel. That would take several days,” Stolarski explains.
3D scanning technology continues to help Accudyn minimize risk by reacting faster to mold repair challenges.
3D scanning enabled Accudyn to get an accurate representation of the entire mold surface area within a few hours. This technology’s precision facilitated a streamlined reverse engineering process and eliminated the need for a complete redesign.
The 3D scanner collects millions of data points in seconds, creating a comprehensive point cloud or mesh model. This accurate and noncontact method enables quick and efficient inspection, capturing intricate details that traditional measuring tools would struggle to capture. Once the injection mold is placed upward on the scanner stage, the software requires minimal supervision because it automatically adjusts to capture detailed images and measurements.
“Our engineering team overlaid the 3D scan data with a part model with shrink applied, highlighting where we needed to focus our repair,” Stolarski adds. “Then we presented the customer with our plan to weld and insert the cavities. They quickly authorized the repair.”
The surfaces developed from the scan data were transferred to a mold designer, who used them to generate new designs for the mold cavities. Finally, with CAD models in hand, the toolroom developed cutter paths and electrodes to facilitate the repair within a day or so.
“The reverse engineering capabilities we have now, enhanced by 3D scanning, help us keep our customer’s molds producing high-quality injection molded components,” Stolarski says.
Ultimately, 3D scanning reduced or eliminated the most challenging step of the reverse engineering process: getting accurate data for the mold component that must be reverse engineered. Today, 3D scanning technology continues to help Accudyn minimize risk by reacting faster to mold repair challenges.
RELATED CONTENT
-
VIDEO: Can You Integrate a Joystick onto a Robot for Mold Repair?
Tony Demakis, President of Alliance Specialties and Laser Sales and Brian Conner, Channel Development Manager at Universal Robots answer the question of whether or not you can integrate a joystick onto a robot for mold repair.
-
Time to Take Welding in a Different Direction
With an in-house laser welding system, this mold builder increased its sales numbers by turning mold repair work around faster.
-
MMT Chats: SPE MTD 2023 Mold Repair Person of the Year
MoldMaking Technology Editorial Director Christina Fuges sits down with the newly named SPE Mold Technologies Division 2023 Mold Repair Person of the Year to learn about his passion for mold repair. This episode is brought to you by ISCAR with New Ideas for Machining Intelligently.


